The dropbear-initramfs package in Debian is intended to help unlocking encrypted partitions remotely from initramfs. In other words, it can be used to unlock an encrypted block device that may well include the root partition.
Officially only a single IPv4 address may be set up in a convenient way. This weblog post shows how to get around that limitation, without too much hassle.
The only package needed is dropbear-initramfs. Install it:
# apt-get install dropbear-initramfs
The network device is located in specified on the DEVICE environment variable in /etc/initramfs-tools/initramfs.conf. We specify a device that will not exist:
DEVICE=nosuchnetdev
The network configuration would be specified in the IP variable but we omit this as we don’t intend to use the default scripts for setting up the network configuration. Instead, we add a few extra bits to /etc/dropbear-initramfs/config. The dropbear configuration file is actually sourced by the shell so executing commands is entirely possible.
# This line is important --- it fools the initramfs
# scripts to believe the device is already set up.
touch /run/net-nosuchnetdev.conf

# modprobe the driver for your network adapter.
# Change this to correspond to your system.
modprobe e1000e

__getdev2() {
        echo ${2%:}
}

__getdev() {
        __getdev2 $(ip link list | grep -B 1 $1 | head -1)
}

# MAC addresses of the devices; replace with your own
eth0=$(__getdev 00:11:22:33:44:55)

# Set up network here as you like. The configuration will be
# overridden with what you have set up in /etc/network/interfaces
# once the boot continues.
ip addr add 192.168.1.1/24 dev $eth0
ip addr add 2001:db8::1/32 dev $eth0
ip link set up dev $eth0
Now, update initramfs and you should be ready to log in remotely to initramfs on your next boot.
Edit 2018-09-25:
Remember to put your own public key to /etc/dropbear-initramfs/authorized_keys so you’ll be actually able to log in. Also see the documentation in /usr/share/doc/dropbear-initramfs/README.initramfs .
Edit 2018-09-20:
The initramfs image can be updated with the following command:
# update-initramfs -u
Edit 2018-09-25:
After rebooting you can log in remotely as root via ssh. Run
# cryptroot-unlock
After providing the passphrase your system should boot up as expected.
Most commonly the guides for installing (GNU/)Linux distributions in virtual machines such as QEMU (+KVM) involve using emulation of a graphics display. This is most likely because it’s convenient, and most installation programs default to using VGA display on PCs.
While this is mostly effortless, there are a few drawbacks. VNC requires listening a TCP port or a Unix socket on the server. If configure the VNC server to listen a TCP port, anyone can connect, so be sure to set a decent password for the VNC server. Still, even if you set a decent password, a security-conscious administrator might not want to expose that TCP port at all, possibly even locally. If you use a Unix socket, it’s a pain to use the VNC connection if the network throughput is limited. Even the VNC protocol does require a lot more network throughput to be usable than just a remote shell on a terminal would.
The alternative is to switch to a virtual serial port as soon as possible in the installation. Most distributions do not support installation through a serial port out of the box, but BIOS may support VGA emulation on a serial console. That’s right; you get what you’d see on a VGA display to a serial port. Only text modes are supported, naturally. In Debian, the package offering such a BIOS ROM option is sgabios.
This guide expects you’re also using libvirt.
Enabling serial console and serial port VGA emulation on a virtual machine
First, install the sgabios package:
apt-get install sgabios
Then, add the following line to the os section of the QEMU virtual machine’s libvirt domain:
<bios useserial='yes'/>
This enables VGA text mode emulation for a serial port. Enabling the serial port itself and serial console is achieved by adding the following entries to the devices section of a libvirt domain:
Edit 2018-04-12: In addition to adding the above lines, you will need to remove existing console definitions.
Installation
These instructions are for Debian stable. The same approach is likely to work on other distributions as well.
Set up the virtual serial port as instructed above, and start the installer. I don’t elaborate that as there are plenty of good guides for that. Use virsh to connect to the virtual serial port after starting the domain:
virsh console domain
You should see the first messages from BIOS or the boot loader, depending on how fast you connect to the domain’s console after starting the domain. You may also see nothing at all until you push the arrow buttons.
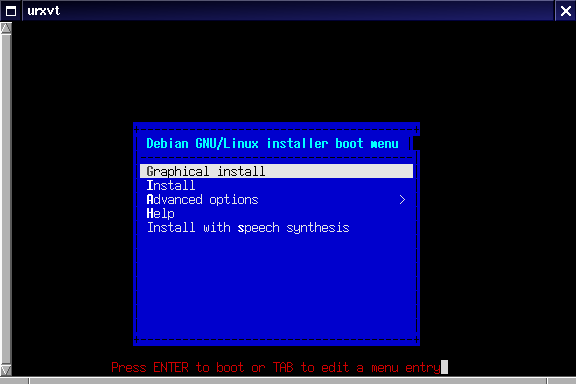
Debian installer on virtual serial port with sgabios VGA emulation
The arrow keys don’t appear to work very well. Select the item you want, i.e. non-graphical installation. Don’t press enter yet, instead press tab. This lets you to set kernel’s command line options. Remove “— quiet” and replace it with
console=ttyS0 vga=none
And press enter. You should be able to continue the installation normally now.
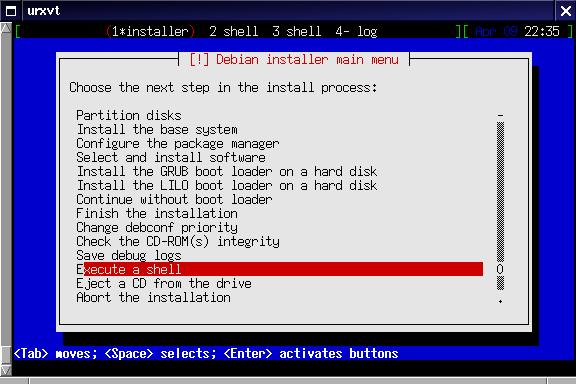
Once the packages and the boot loader are installed, do not reboot the system yet. We still need to configure the boot loader to use the virtual serial console. Choose to go back, and then execute a shell:
Bind mount the virtual file systems under /target and chroot to /target:
mount -o bind /proc /target/proc
mount -o bind /sys /target/sys
mount -o bind /dev /target/dev
chroot /target /bin/bash
Permanently enabling serial port console for Grub and Linux kernel
Setting the kernel command line to include the serial console earlier only allowed installing Debian, but the serial console configuration now needs to be made permanent. That can be done by changing Grub configuration:
nano /etc/default/grub
Replace the two lines here in the default configuration (in two different locations of the file):
And you’re done! The next time you reboot the virtual machine, it should start off with the console available on the serial port right from the beginning.
Finishing the installation
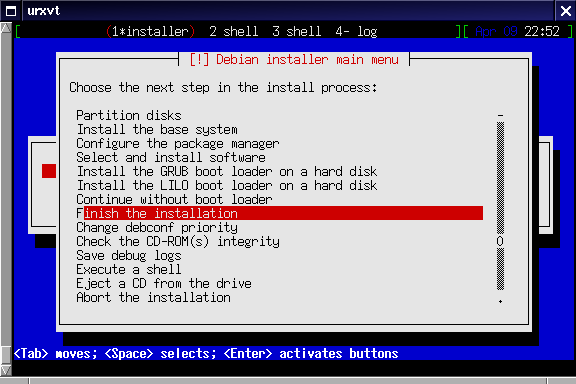
If you were installing Debian, unmount the file systems you mounted and return to the installer:
exit # to exit the chroot environment
umount /target/sys /target/dev /target/proc
exit # to get back to the installer
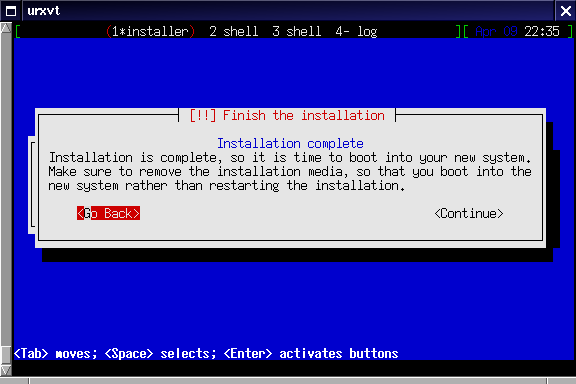
Now we’re ready to proceed to reboot the system.
The installation is now complete and you can boot from the virtual disk, with virtual serial console enabled.